Does your computers boot time suck? Do you have a Dual core processor or more? If you do than this is for you! This tweak will speeds up your boot time by editing a config file.

Step 1: Open Terminal


Step 2: Enter this Command and Press Enter
                           sudo gedit /etc/init.d/rc 
Picture
Step 3: Enter your Password and Press Enter


Step 4: Press Ctrl + F and you will get this prompt
Picture
Step 5: Input CONCURRENCY in the Search For: Prompt and Press Enter
Picture
Step 6: Change CONCURRENCY=none to read CONCURRENCY=shell
Picture
Step 7: Reboot

You will see a Speed increase in your Boot time after you reboot. More tweaks to come!!!
 
 Ubuntu Server is a easy Server OS to install. This guide will show you how to install Ubuntu Server with a GUI. This will show you how do a basic installation, You will have to install the modules that you want based on its role.


Step 1: Boot the ISO

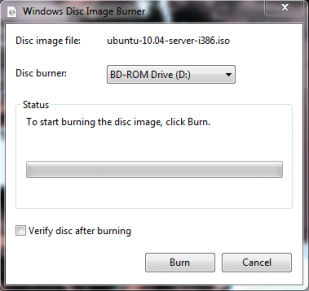
1a You will have to download the ISO from http://www.ubuntu.com/server. and burn it to a CD.
Picture
1b After it is Burnt, Insert the disc and reboot your computer. ( Adjustment of your BIOS Boot Order may be in order)


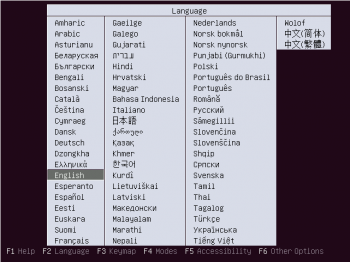
1c Select your language and press enter
Picture
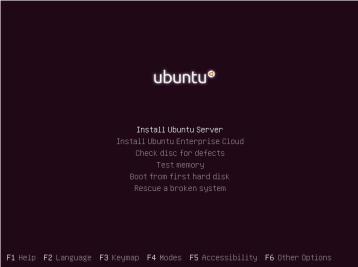
2d Next select Install Ubuntu Server 
Picture


Step 3: Start installing the OS


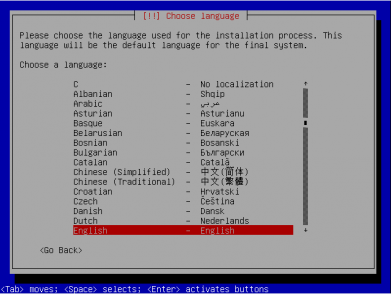
3a Select your Language
Picture
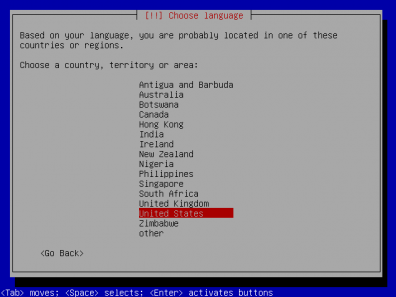
3b Choose your Territory
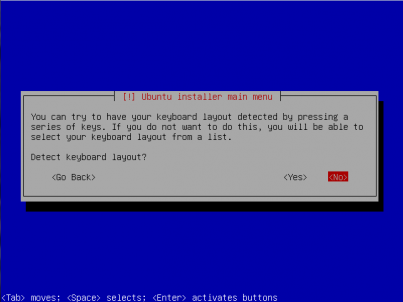
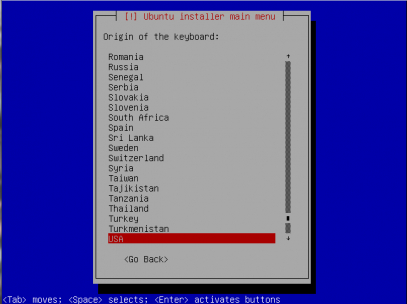
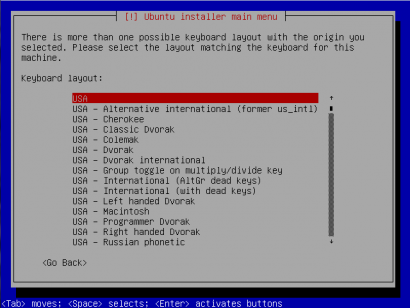
Picture
3c Keyboard Setup
     Select No
Picture
      Next Select keyboard 
Picture
     Next select USA
Picture
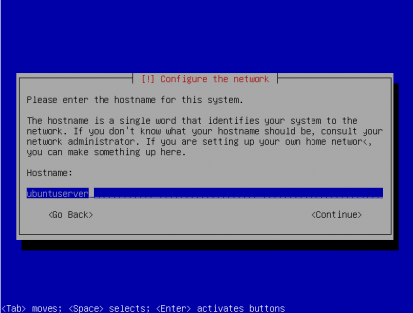
3d  Wait a Minute, after a second you will get a asked to enter a Host Name.
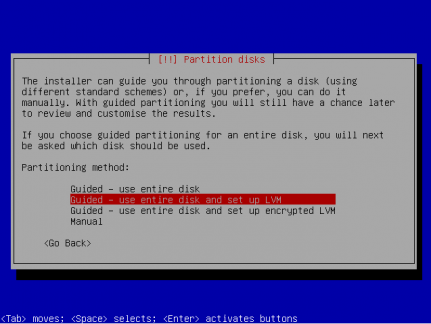
Picture


Step 4: Partitions

4a After the Clock setup, You will get this screen. Press Enter.
Picture
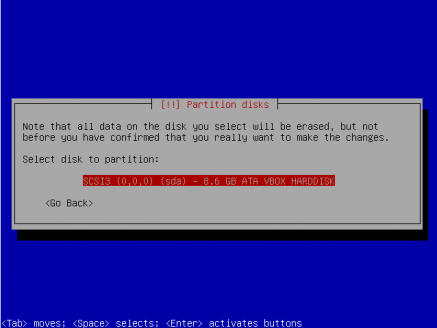
4b Select your Partion and press enter.
Picture
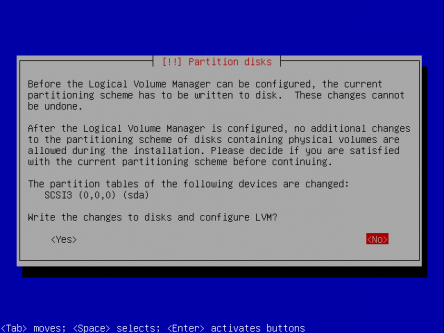
4c Select Yes and continue
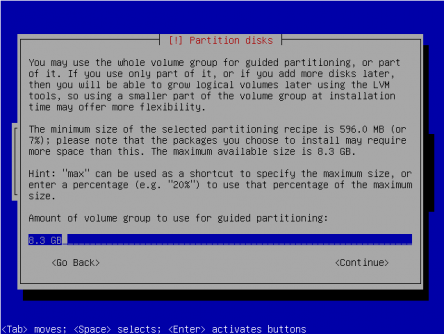
Picture
4d Next hit Enter
Picture
4e Select Yes to write changes to the Disk


Step 5: Wait for the OS to install

5a Wait

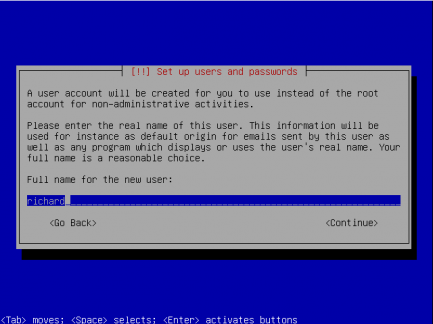
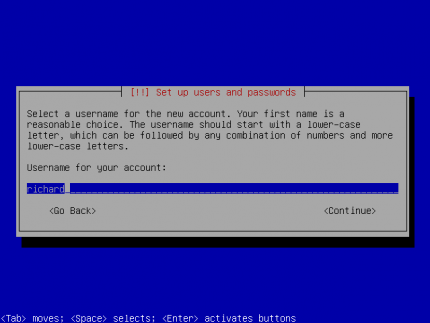
5b Enter your Username 
Picture
5c Press Enter
Picture
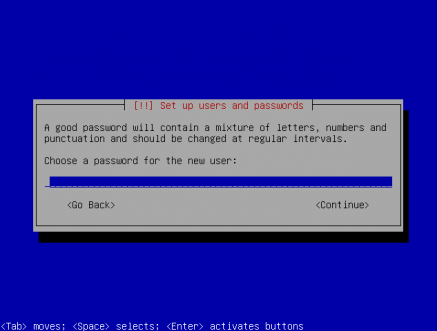
5d Enter your Password or Passphrase
Picture
5e Verify password

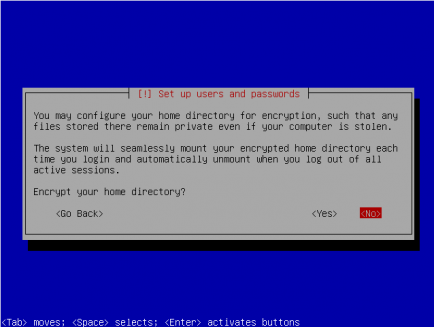
5f Press Yes to the Encrypt Home prompt
Picture
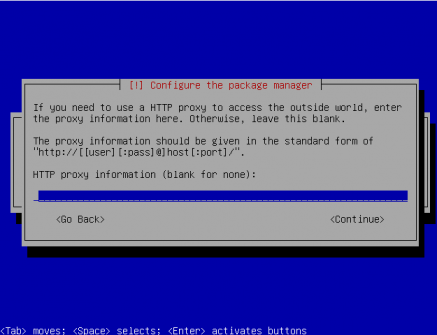
5g Leave the Proxy Info prompt blank and press Enter 
Picture
Step 6:

6a Let APT configure

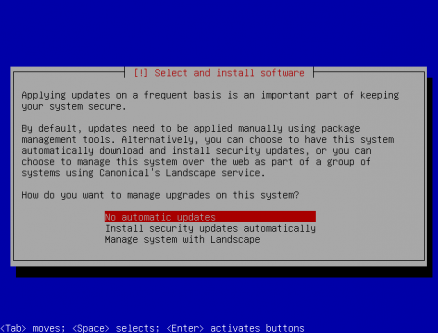
6b Select Install Security Updates Automatically
Picture
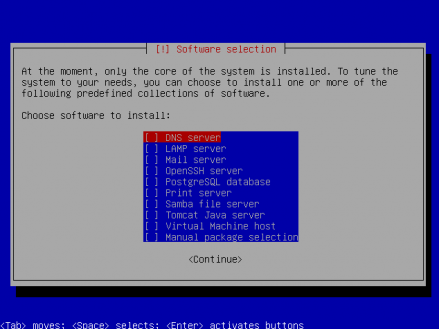
6c Select Software for server (More can be installed)
Picture
6e Wait for Software to Install and thank the Ubuntu Gods that you do not have to do it manually

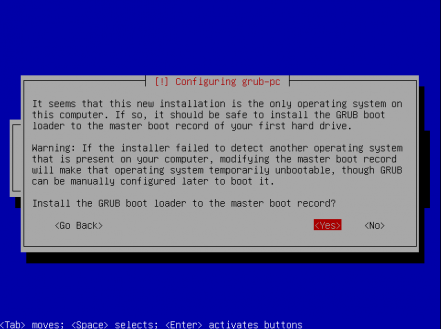
6f Select Yes to install GRUB
Picture
6g More Waiting

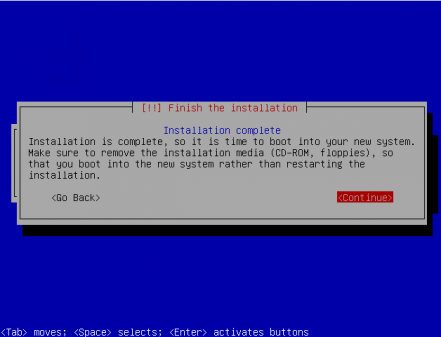
6h Remove the CD and Press Enter Here
Picture
Step 7: Install GUI


7a After Reboot and enter username and password


7b Install GUI with these following command:
                     sudo apt-get update
                     sudo apt-get install ubuntu-desktop
Picture
Picture
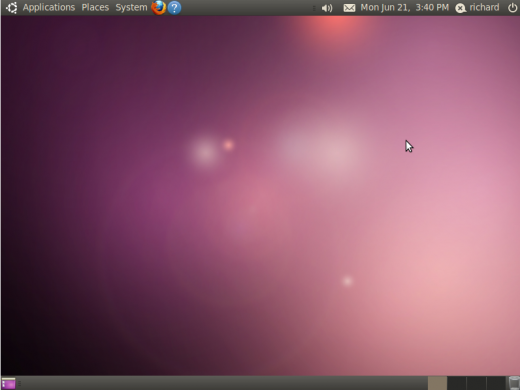
This will take some time to download and install. All and all very easy, especially for a Linux Distro.
Picture
This is a complete installation of Ubuntu Server 10.04 with a GUI. Have Fun... More Ubuntu to come!
 
  Even been to a website that loads sluggish or not at all, one solutions is your MTU settings. Default it is set to 1500, but slightly adjusting this number will help significantly. This is pretty simple, but a little time consuming. This is how it is done.

Step 1: Finding your Setting


1a Use thsudois command to set a MTU setting. 
           Copy and Paste into Terminal: sudo ifconfig eth0 mtu 1492
    I started with the setting 1492.
Picture
1b Next you ping, preferably a ISP ( They do not block ICMP). My time on 1492       was slow so I steped down. My number was 1472
    Numbers you should use: 1492, 1484, 1472, 1468, 1460
    
Picture


Step 2: Set MTU Setting Permanent


2a Edit the following directory: /etc/network/interface
       Use this Command: sudo gedit /etc/network/interfaces 
       and enter your password
Picture
2b What you need now is the following:
                    IP Address
                    Network 
                    Gateway
                    Netmask
                    mtu (your preferred setting) --My Config: mtu 1472--


Next Click Save
Picture
2b Run the following command to restart your Network:
                  sudo /etc/init.d/networking restart
Picture


Step 3: Were did I get this?

3a Check Out this Blog: TTC Shelbyville Blog

Step 4: There is no Step 4
Kudos to anyone who got that...


MTU Temporary Settings in Ubuntu 9.10
 
Ever wanted Compiz or your favorite FPS in VirtualBox... Now you can. This tutorial will show you how to configure 3d Acceleration for Ubuntu 10.04 (Ultimate Edition 2.7). The only catch is your hardware will have to support VirtualBox AND 3D effects.

Step1: Setup 3D Acceleration

1a Select your Virtual Machine and Click Setting

1b Click on Display, then set your Video Memory to 12b MB, and then enable 2d and 3d acceleration
Picture
1c Click OK

Step 2: Installing Guest Additions

2a Start and let the Virtual Box boot up

2b Click on Devices and select Install guest Additions
Picture
2c In the Ubuntu Virtual Machine, Click on Places and select VBOXADDITIONS
Picture
2d Click on Open AutoRun Promt and Click Run
Picture
2e Enter your Password
Picture
2f  Let Guest Additions Install and Restart
Picture
Step 3: Start Compiz

3a Goto System > Preferences > Appearence > Visual Effects

3c Click on Extras and install and configure Compiz the way you want it.

Done. Now you can run 3d acceleration running Ubuntu in VirtualBox. My favorite effect... Water. This will allow you to do the Cube and most 3D effect. The last clip is my to-the-point video on the subject.
Picture
    ip information
    Picture

    Richard Carpenter

    A Young Computer Guy in a Old Computer World

    Archives

    January 2012
    November 2011
    January 2011
    October 2010
    September 2010
    July 2010
    June 2010

    Categories

    All
    10.04
    Dangers Of Linux Series
    Facebook
    Internet
    Linux
    Mac
    Operating Systems
    Operating Systerms
    Security
    Server
    Sniffing
    Ubuntu
    Virtualbox
    Virus Treats